Cleanup removes a tracked object from the shot and rebuilds the background behind it. The result is a new plate, a take, that you can view in place of the original and export to Nuke.
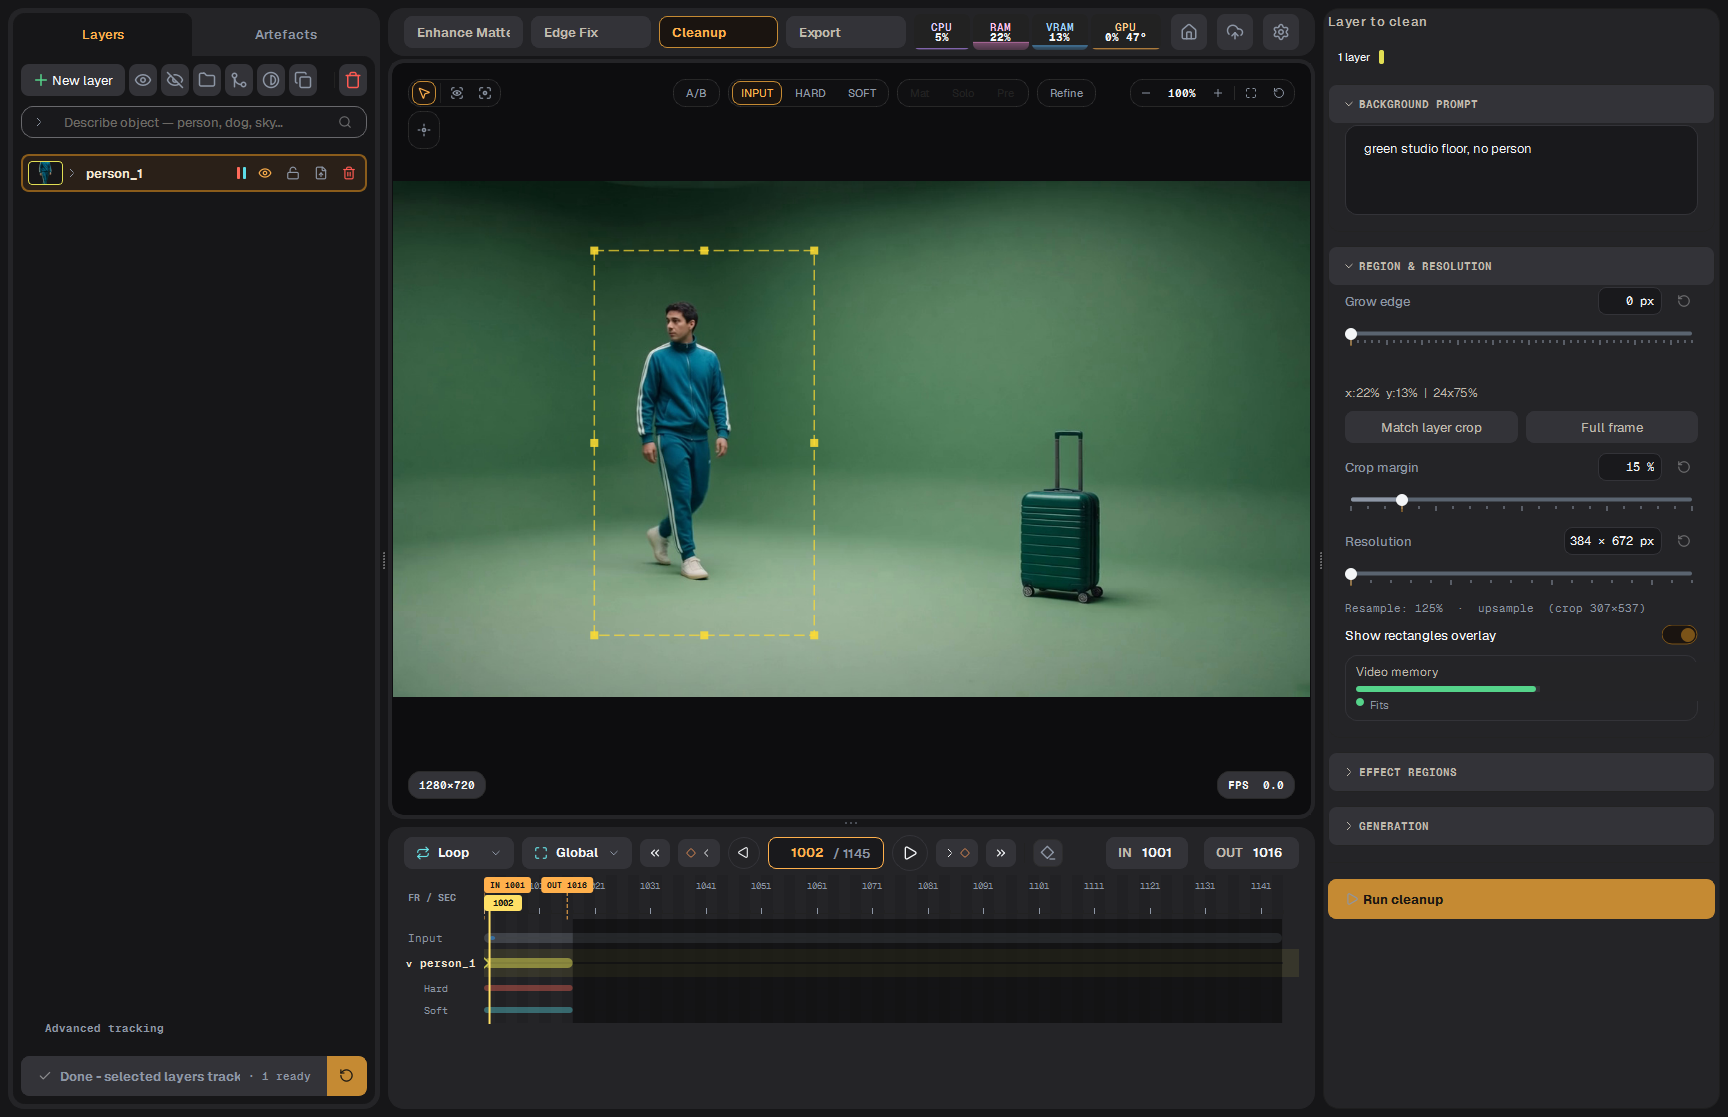
The Cleanup stage ready to run: the man's layer is selected, the crop follows his path
Before you start
Track the object you want to remove. Its Hard matte is the removal mask.
Set IN/OUT. Cleanup works on that range.
Select one layer and open Cleanup on the stage bar.
Removal mask
Layer to clean shows the selected layer.
Grow edge widens the removed area by that many pixels. At 0 the layer's mask is used with its soft edge. Raise it if a thin outline of the object is left behind.
Background prompt
Describe the scene as it should look without the object, for example "a forest with a tree trunk and a wooden shed, no people". Plain short sentences work best.
Region and resolution
Control
What it does
Match layer crop
Crops the work area to where the object moves between IN and OUT, with Crop margin around it. You can drag the crop handles on the viewer.
Full frame
Works on the whole frame. Use it when the object fills the frame or is scattered. The whole frame is scaled down harder than a tight crop.
Crop margin
Room around the object's path, as a share of its size.
Resolution
The working size. The line under it shows how much the crop is scaled.
Show rectangles overlay
Shows the crop and effect rectangles on the viewer.
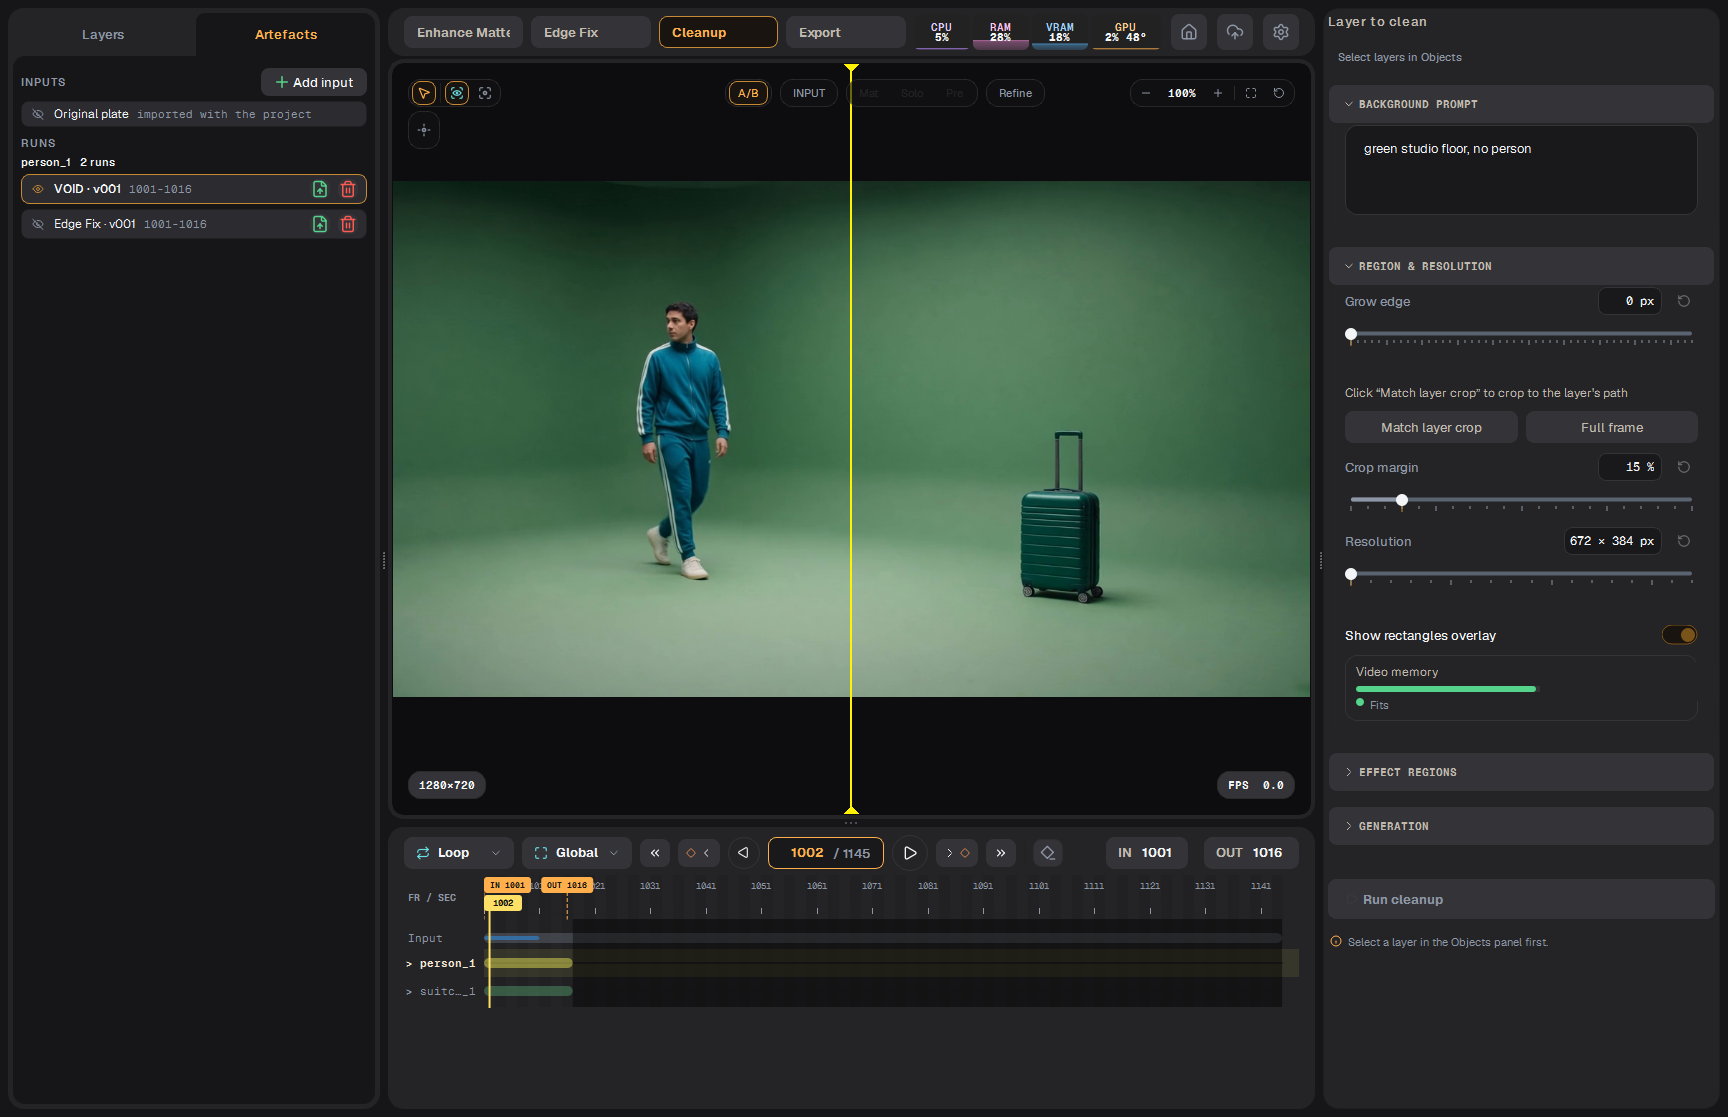
The crop switches to the whole frame, with the person still marked.
Effect regions
Shadows, reflections and contact marks are not part of the object's mask, but they should go too. Press + Draw and drag a rectangle over the shadow. If it moves, go to another frame, move the rectangle and press + Key: the rectangle is animated between keys. Remove and Clear all delete rectangles.
Generation settings and run
Denoise steps: more steps, more detail and more time.
Pass 2: a second refining pass. Slower, steadier.
GPU memory mode: Full GPU is fastest; bf16 offload, the 8-bit mode and Sequential need less video memory and are slower. Pick a lighter mode if you get a memory error.
Seed: sets the starting value for generation. Change it to produce another fill.
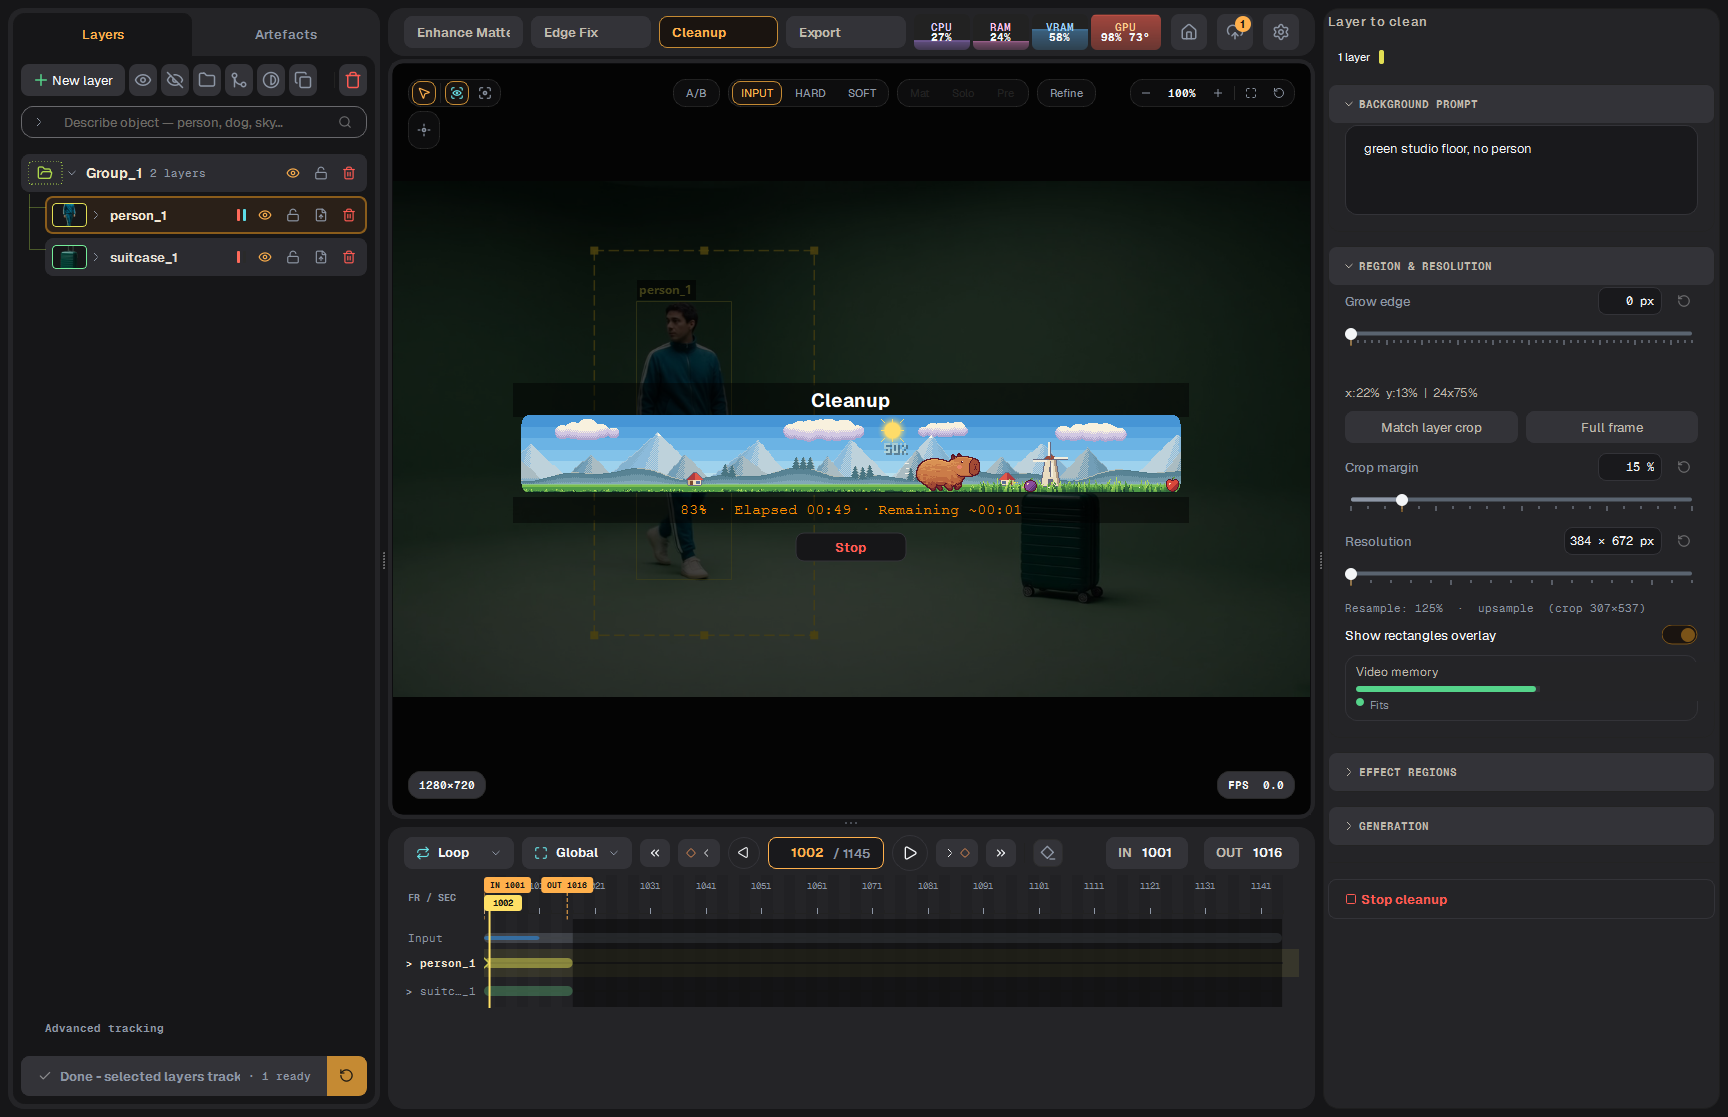
Press the run button at the bottom of the drawer. The run goes through several phases with a progress bar over the picture.
Selecting the layer, matching the crop, typing the background prompt and starting the run.Cleanup running: percentage, elapsed and time left
Using the result
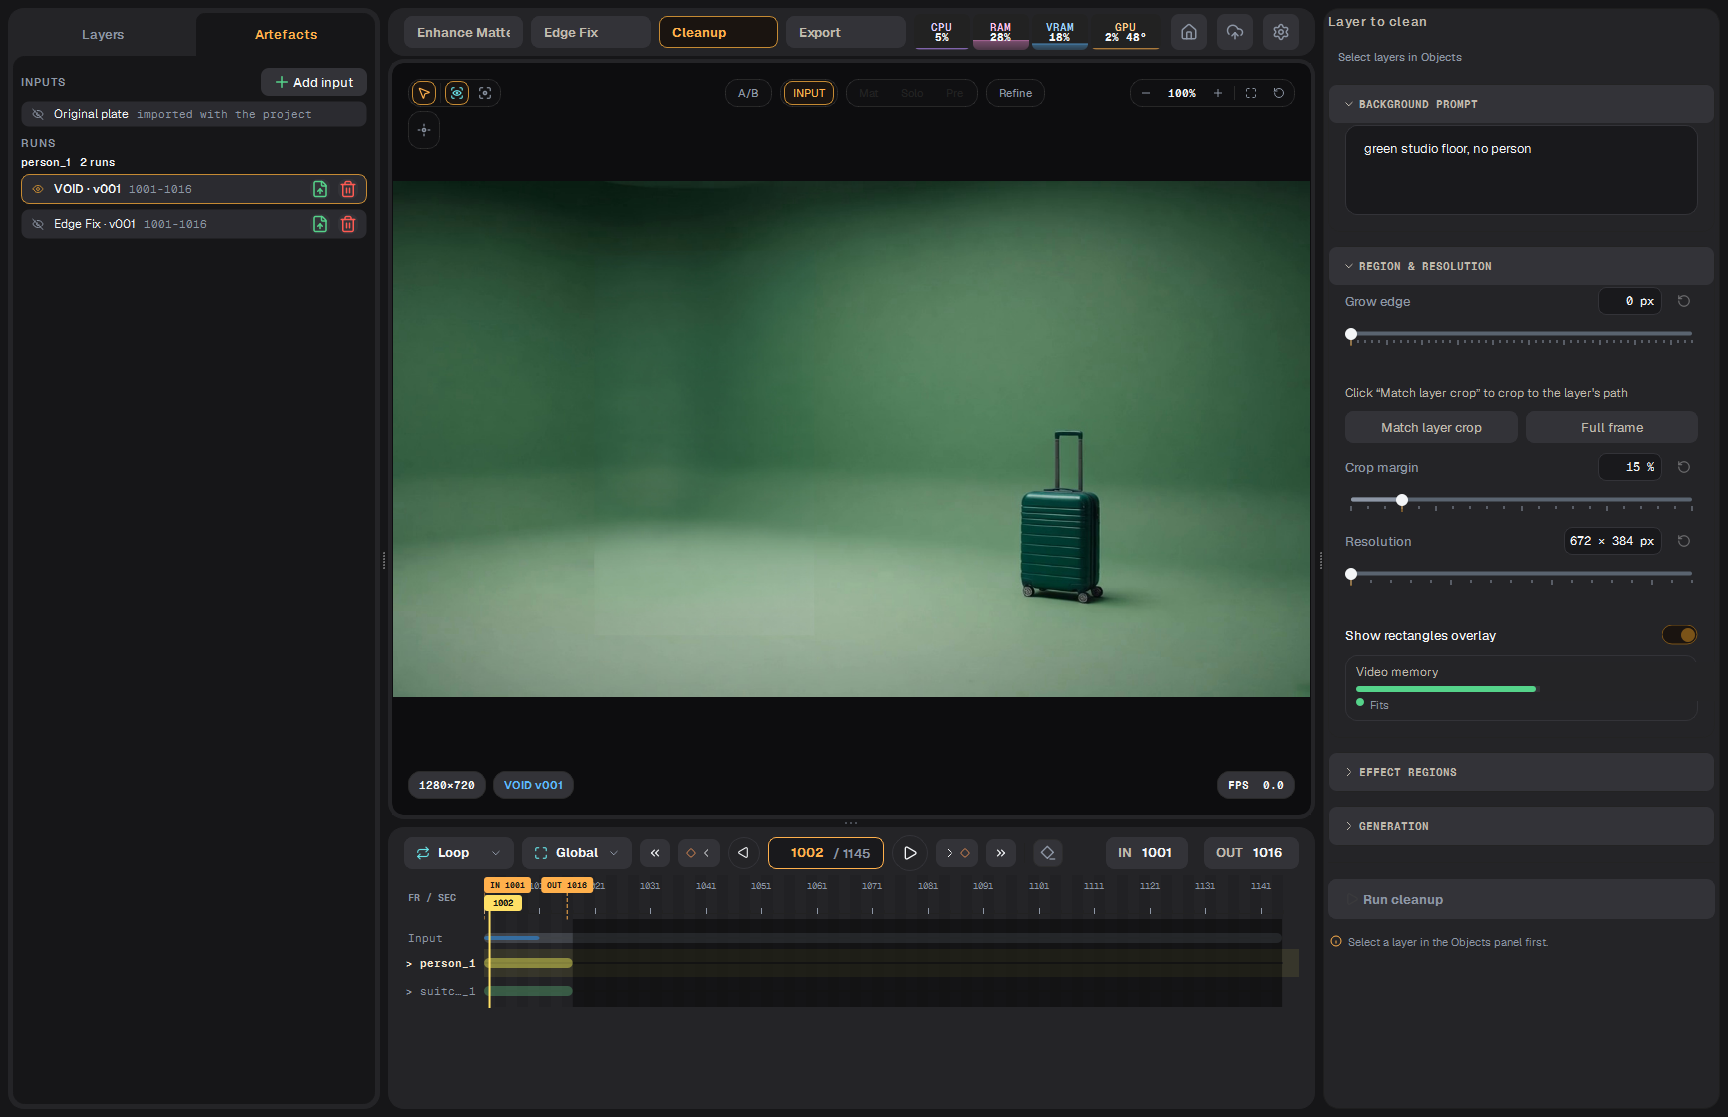
When the run ends, the viewer shows the take in place of the plate.
A/B: the original on the left of the split, the cleaned plate on the right (left picture); the whole cleaned frame (right picture).The cleaned plate playing.
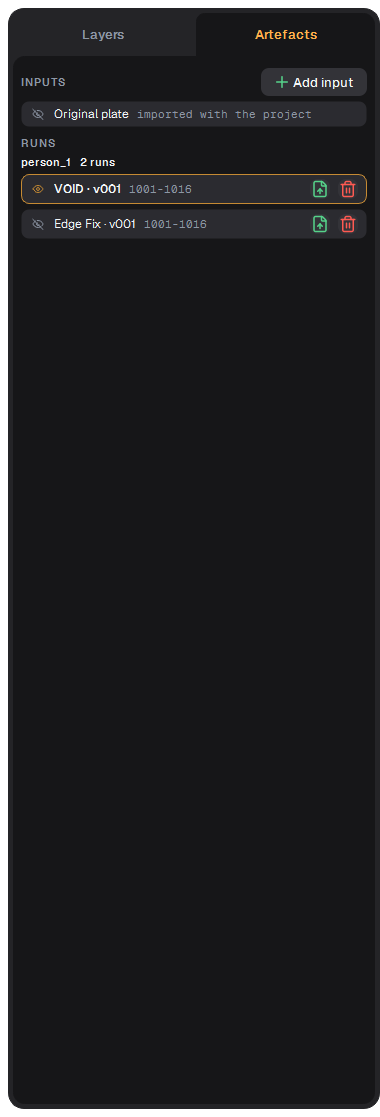
Runs collect in the Artefacts tab of the Objects panel. Click a run to view it, Original plate to go back. The arrow on the INPUT button picks the same.
Tip Try a short range and a low resolution first. When the fill looks right, widen the range and raise the resolution.
Cleanup (удаление объекта)
Cleanup удаляет затреканный объект из шота и восстанавливает фон за ним. Результат — новый плейт, тейк, который можно смотреть вместо оригинала и экспортировать в Nuke.
Этап Cleanup готов к запуску: выбран слой человека, кроп повторяет его путь
Перед началом
Затрекайте объект, который хотите убрать. Его Hard-маска — маска удаления.
Поставьте IN/OUT. Cleanup работает в этом диапазоне.
Выберите один слой и откройте Cleanup на панели этапов.
Маска удаления
Layer to clean показывает выбранный слой.
Grow edge расширяет удаляемую область на столько пикселей. При 0 используется маска слоя с её мягким краем. Увеличьте, если остаётся тонкий контур объекта.
Описание фона
Опишите сцену такой, какой она должна быть без объекта, например «a forest with a tree trunk and a wooden shed, no people». Лучше всего работают простые короткие фразы на английском.
Область и разрешение
Настройка
Что делает
Match layer crop
Обрезает рабочую область до места, где объект движется между IN и OUT, с запасом Crop margin. Ручки кропа можно тянуть во вьюере.
Full frame
Работа по всему кадру. Для объектов на весь кадр или разбросанных. Весь кадр уменьшается сильнее, чем плотный кроп.
Crop margin
Запас вокруг пути объекта, в долях его размера.
Resolution
Рабочий размер. Строка под ним показывает, насколько масштабируется кроп.
Show rectangles overlay
Показывает во вьюере прямоугольники кропа и эффектов.
Кроп переключается на весь кадр, человек по-прежнему отмечен.
Области эффектов
Тени, отражения и следы контакта не входят в маску объекта, но их тоже надо убрать. Нажмите + Draw и обведите тень прямоугольником. Если она движется, перейдите на другой кадр, сдвиньте прямоугольник и нажмите + Key: прямоугольник анимируется между ключами. Remove и Clear all удаляют прямоугольники.
Настройки генерации и запуск
Denoise steps: больше шагов — больше деталей и дольше.
Pass 2: второй уточняющий проход. Медленнее, стабильнее.
Режим памяти GPU: Full GPU самый быстрый; bf16 offload, 8-битный режим и Sequential требуют меньше видеопамяти и работают медленнее. При ошибке памяти выберите режим полегче.
Seed: задаёт начальное значение для генерации. Измените его, чтобы получить другой вариант заливки.
Нажмите кнопку запуска внизу панели. Прогон идёт в несколько фаз, с полоской прогресса над картинкой.
Выбор слоя, кроп по слою, описание фона и запуск.Cleanup идёт: проценты, прошедшее и оставшееся время
Работа с результатом
Когда прогон закончится, вьюер показывает тейк вместо плейта.
A/B: оригинал слева от границы, очищенный плейт справа (левая картинка); весь очищенный кадр (правая картинка).Воспроизведение очищенного плейта.
Прогоны собираются на вкладке Artefacts панели Objects. Щёлкните по прогону, чтобы посмотреть его, по Original plate — чтобы вернуться. Стрелка на кнопке INPUT выбирает то же.
Тейк экспортируется через Export → Artefacts to export.
Вкладка Artefacts
Совет Сначала попробуйте короткий диапазон и низкое разрешение. Когда заливка выглядит правильно, расширьте диапазон и поднимите разрешение.