Enhance Matte turns a tracked layer into a matte with real edges: motion blur, fingers, hair and soft cloth. You start it with one button, Auto enhance. Then you check the edge in Refine and fix it with a brush where needed.
Before you start
Prepare a layer and its Hard mask. A mask is needed across the selected range.
Set the IN/OUT range. Auto enhance only computes frames inside IN/OUT. Try a short range first, check it, then run the whole shot.
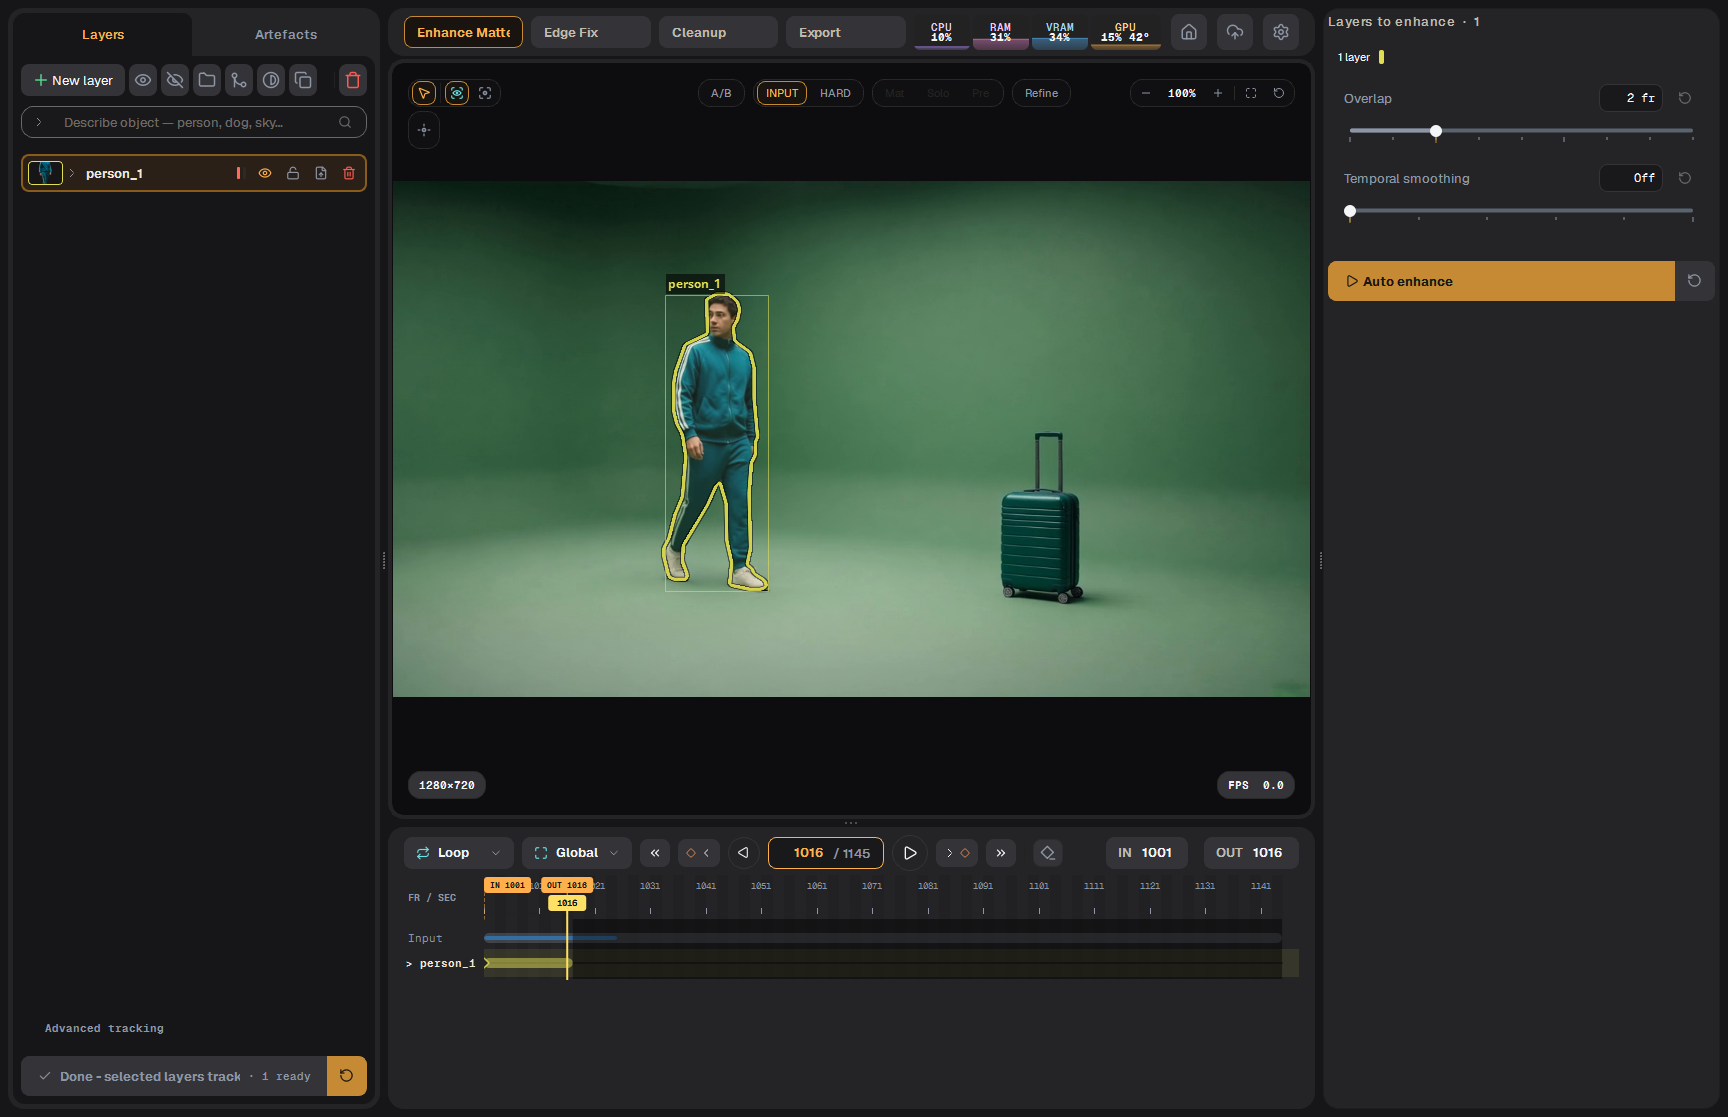
Select the layers you want in the Objects panel. The drawer shows them as Layers to enhance · 1.
Open the stage: click Enhance Matte on the stage bar.
Hard and Soft
Each layer has two mattes. You switch between them with the HARD and SOFT buttons on the viewer.
Hard is the layer's mask, either tracked, drawn or imported. It is the input mask used to process the layer.
Soft is what Auto enhance makes. The edge gets real transparency: a blurred hand is semi-transparent, and gaps between fingers open up.
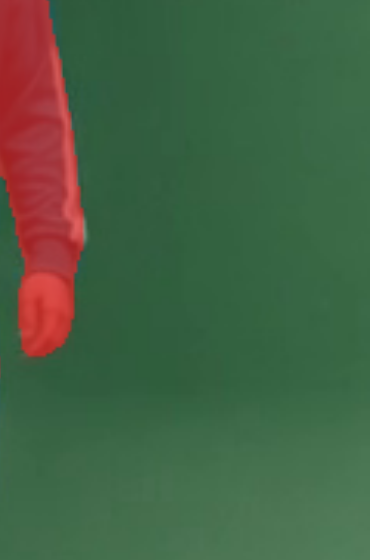
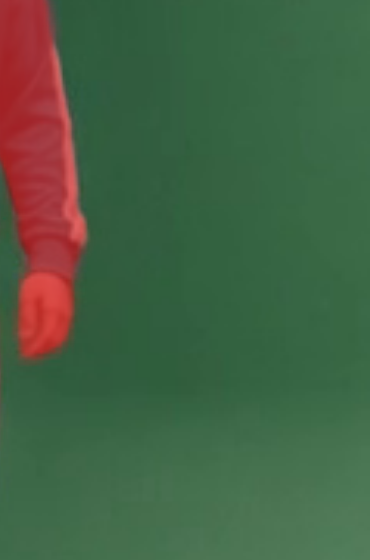
Sleeve and hand, zoomed in. Left: Hard, a flat edge. Right: Soft, the edge feathers into the green.
Tip Turn on Solo to see the matte alone in black and white, and zoom in on the edge (mouse wheel, F fits the frame back). Mat lays the matte over the picture in colour, and Pre shows the picture multiplied by the matte.
Settings
The Enhance Matte panel
Setting
What it does
When to change it
Overlap
The shot is computed in chunks of frames. Overlap is the number of frames two neighbouring chunks share, so the join can't be seen.
Raise it only if you see a flicker where two chunks meet. Each extra frame is computed twice. 0 gives hard cuts between chunks. A short range that fits into one chunk is not affected.
Temporal smoothing
Steadies the edge from frame to frame. Each frame's edge is averaged with this many frames on each side, following the motion. Off by default.
Use it if the edge "boils" or trembles on a static subject. It costs extra time on the CPU.
Running Auto enhance
Press Auto enhance. The app creates a Soft matte for the selected layers for the selected range.
Only what changed is computed. If you add a frame to the range or change the Hard on some frames, the next run computes just those frames. Nothing is deleted.
When every frame in the range is up to date, the button reads Done - auto enhance.
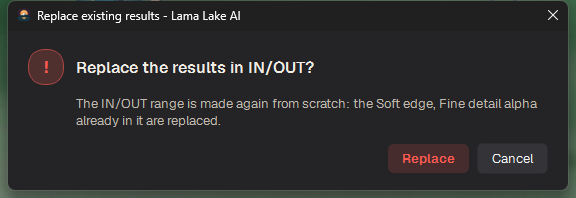
The re-run button (the round arrow next to it) builds the Soft again from scratch for the whole range. If there is a result already, it asks you first:
Re-run asks before replacing existing results
A failure or Stop stops the rest of the run. Frames that are already finished stay.
Reading the progress
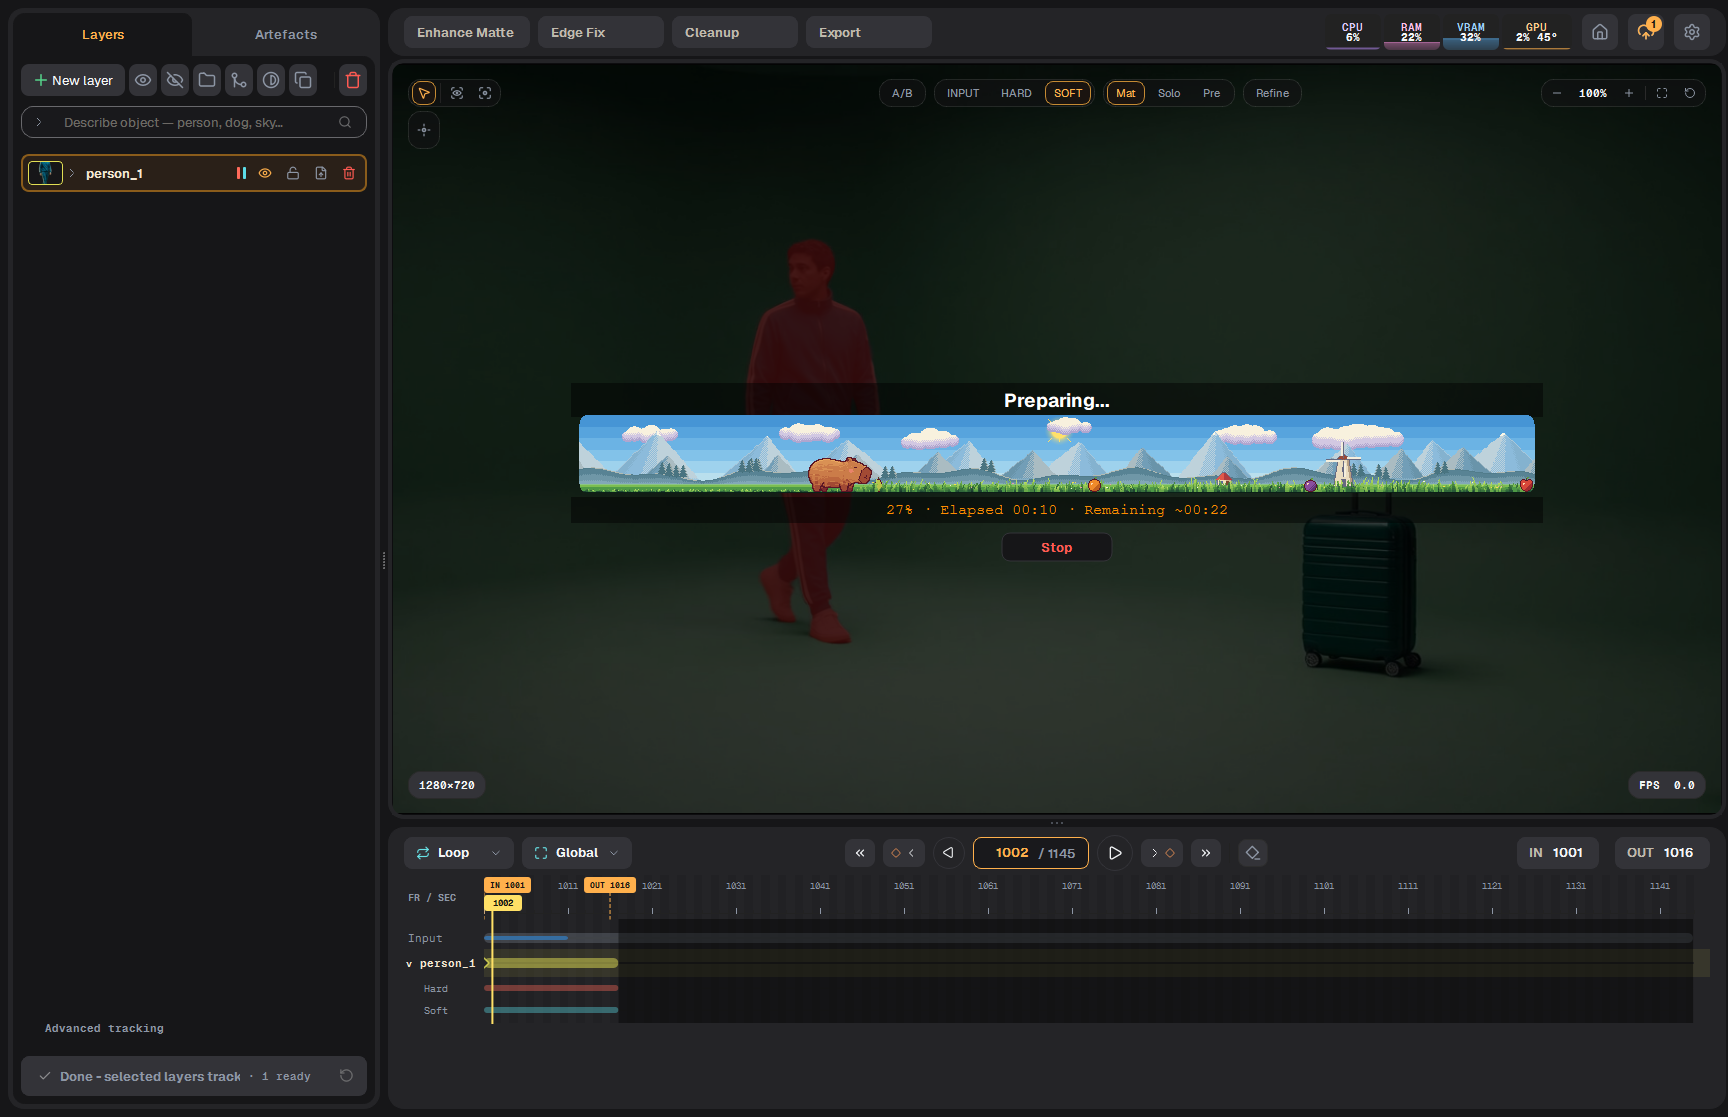
The whole run has one progress bar on the picture. It shows what is happening right now (for example, "Shaping the soft edge…"), the percentage, frames done out of the total, and the elapsed time. The time left appears once the app has enough data to estimate it. Stop is right under the bar.
The progress bar during Auto enhance: percentage, elapsed and remaining time
Note The first run after starting the app takes longer, because the models have to be loaded onto the graphics card. Later runs start almost at once.
Refine: how much strand detail
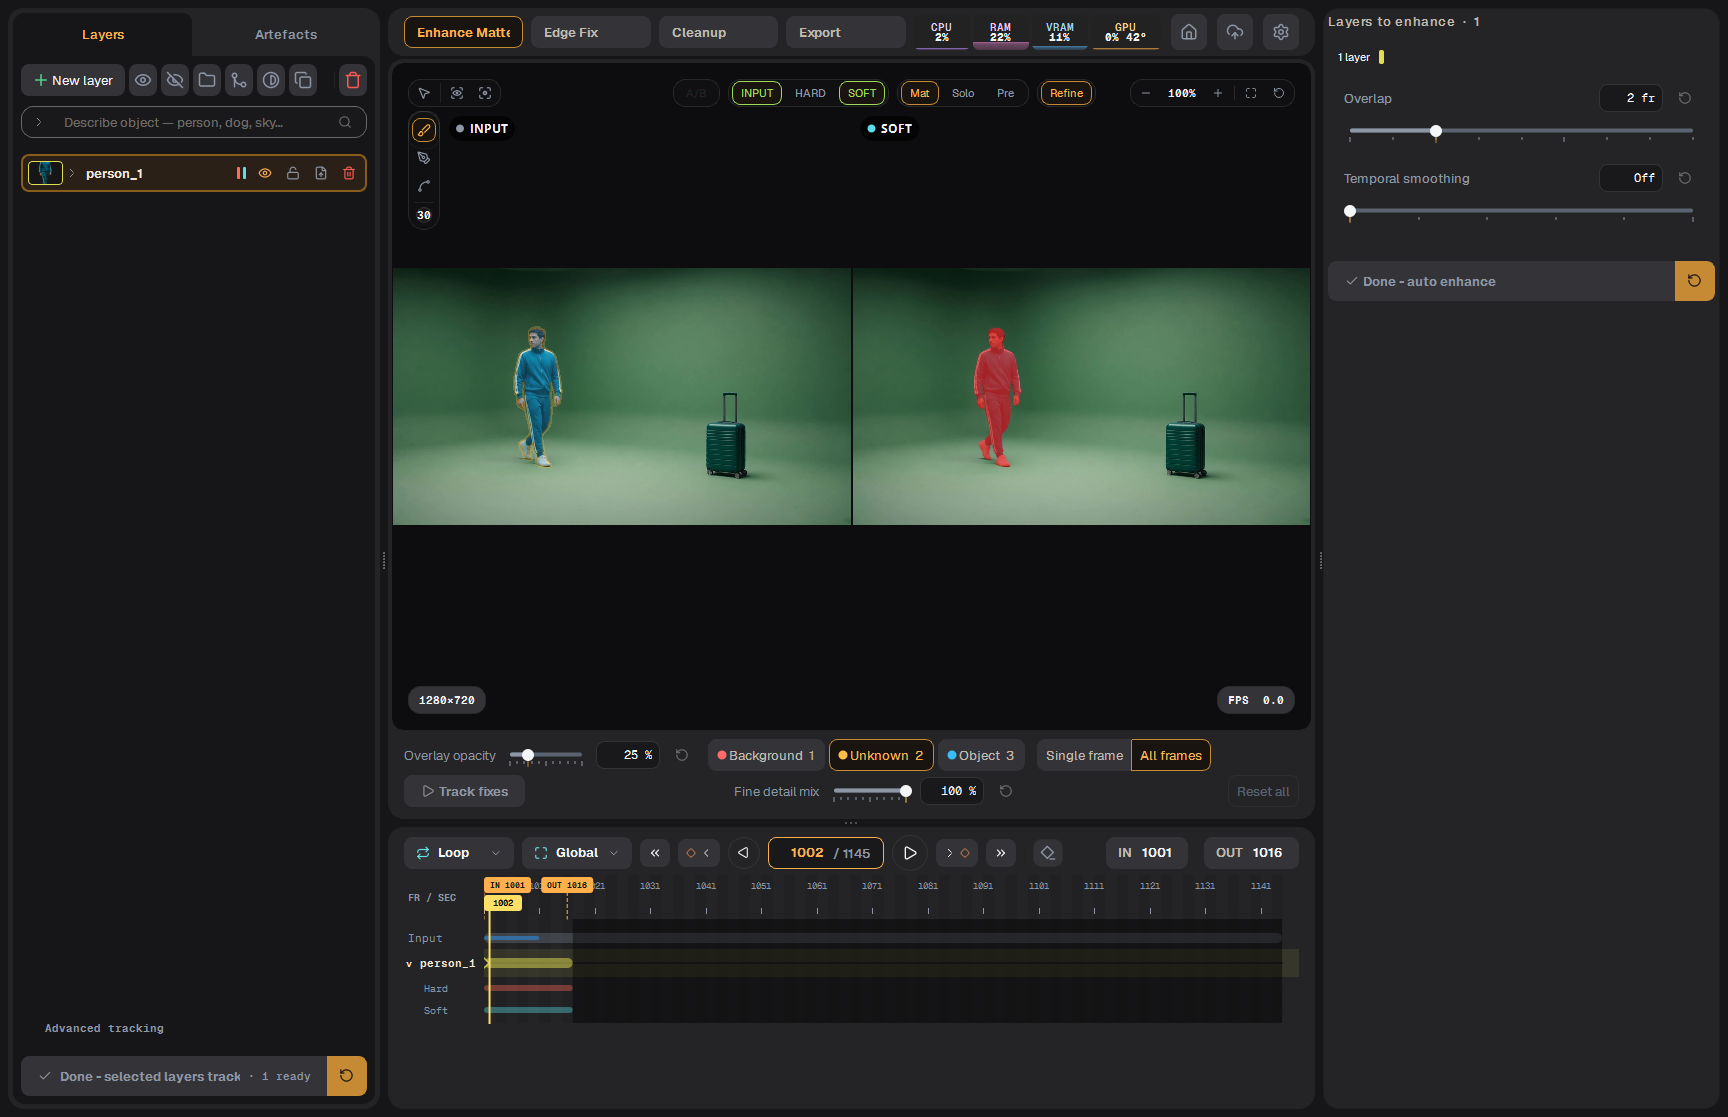
After Auto enhance, press Refine on the viewer. Available views appear side by side; use the view buttons to choose the panes. The toolbar is under the picture.
Refine open: Input beside Soft, with Fine detail mix under the picture
Fine detail mix sets how much of the fine strand detail goes into the Soft: hair, fingers and blur.
0 keeps only the clean, dense edge.
100 adds all the strand detail.
Values in between mix the two.
The slider works on the whole layer at once, not frame by frame.
Moving it recomputes nothing: the picture updates at once. Edge Fix and Export use the value the slider has when they start.
Ctrl+click resets it. A drag is one undo step (Ctrl+Z).
Refine: fixing an edge with marks
When the edge is wrong in one place, you paint marks on the Input side. Marks tell the edge pass what each area is:
Mark
Key
Paint it over…
Background
1
background that leaked into the matte
Unknown
2
an edge that came out too hard or wrong, so it is worked out again (fingers, hair, blur)
Object
3
holes in the subject that should be solid
Each stroke recomputes the current frame in a small area around the marks. It takes about a second or two, so you see the result straight away.
Brush size is the number under the drawing tools on the left of the viewer. Hold Shift and drag on the picture to change it.
Before painting, choose Single frame for a local correction or All frames for a correction to carry. Mark a few key frames and press Track fixes: All frames marks follow the motion over IN/OUT, then affected frames are recomputed.
Delete a frame’s marks using the timeline’s delete keys. Reset all removes the layer’s corrections. If Soft is out of date after a Hard change, use Update.
Careful Marks and Fine detail mix only work on a layer that already has its Soft, so run Auto enhance first.
Tips
Short range first. Set IN/OUT to 10–20 hard frames, run, check in Solo at 200–400% zoom, and only then run the whole shot.
Judge the edge on motion. Fast hands and turning heads show problems that a still frame hides. Play the range in Loop (L, K).
Background creeping into the matte? Choose All frames, paint Background marks on a few frames and press Track fixes.
Edge too sharp on blur? Paint Unknown over it.
Flicker exactly at a regular interval is a chunk join. Raise Overlap by one or two frames.
Close Refine to compare Hard and Soft with the A/B wipe (W). Space opens the viewer full screen.
Enhance Matte превращает слой после трекинга в маску с настоящими краями: смаз движения, пальцы, волосы, мягкая ткань. Запускается одной кнопкой Auto enhance. Потом край проверяется в Refine и, где нужно, правится кистью.
Перед началом
Подготовьте слой и маску Hard. Маска нужна на всём выбранном диапазоне.
Задайте диапазон IN/OUT. Считаются только кадры внутри IN/OUT. Начните с короткого куска, проверьте его и только потом запускайте весь шот.
Выберите слои в панели Objects. В панели этапа они видны как Layers to enhance · 1.
Откройте этап: кнопка Enhance Matte на панели этапов.
Hard и Soft
У каждого слоя две маски. Переключаются они кнопками HARD и SOFT на вьюере.
Hard — маска слоя: протреканная, нарисованная или загруженная. Она служит исходной маской для обработки слоя.
Soft — то, что делает Auto enhance. Край получает настоящую прозрачность: смазанная рука полупрозрачна, промежутки между пальцами открываются.
Рукав и кисть крупно. Слева Hard, ровный край. Справа Soft: край мягко сходит в зелёный.
Совет Включите Solo, чтобы видеть маску отдельно, чёрно-белой, и приблизьте край колесом мыши (F возвращает кадр целиком). Mat кладёт маску цветом поверх картинки, Pre показывает картинку, умноженную на маску.
Настройки
Панель Enhance Matte
Настройка
Что делает
Когда менять
Overlap
Шот считается кусками по несколько кадров. Overlap — сколько кадров соседние куски делят между собой, чтобы стык не был виден.
Поднимайте, только если видно мерцание на стыке кусков. Каждый лишний кадр считается дважды. 0 даёт жёсткие стыки. На коротком диапазоне, который влезает в один кусок, ни на что не влияет.
Temporal smoothing
Успокаивает край от кадра к кадру. Край каждого кадра усредняется с соседними кадрами с каждой стороны, с учётом движения. По умолчанию выключено.
Если край «кипит» или дрожит на неподвижном объекте. Требует дополнительного времени на процессоре.
Запуск Auto enhance
Нажмите Auto enhance. Приложение создаёт Soft-маску для выбранных слоёв для выбранного диапазона.
Считается только то, что изменилось. Если добавить кадры в диапазон или поменять Hard на части кадров, следующий запуск посчитает только их. Ничего не удаляется.
Когда все кадры диапазона готовы, на кнопке написано Done - auto enhance.
Кнопка повторного запуска (круглая стрелка рядом) пересчитывает Soft с нуля на всём диапазоне. Если результат уже есть, она сначала спросит:
Повторный запуск спрашивает, прежде чем заменить готовое
Ошибка или Stop останавливают оставшуюся часть расчёта. Готовые кадры остаются.
Как читать прогресс
Весь расчёт показывает одна полоса прогресса на картинке. На ней видно, что происходит сейчас (например, «Shaping the soft edge…»), проценты, сколько кадров готово из скольких и сколько прошло времени. Оставшееся время появляется, когда приложению хватает данных для оценки. Кнопка Stop — прямо под полосой.
Прогресс Auto enhance: проценты, прошедшее и оставшееся время
Заметка Первый запуск после старта приложения дольше: модели загружаются в видеокарту. Следующие запуски начинаются почти сразу.
Refine: сколько тонких деталей
После Auto enhance нажмите Refine на вьюере. Доступные виды отображаются рядом; кнопки видов позволяют выбирать панели. Под изображением находится панель инструментов.
Refine открыт: Input рядом с Soft, под картинкой Fine detail mix
Fine detail mix задаёт, сколько тонких деталей попадёт в Soft: волосы, пальцы, смаз.
0 оставляет только чистый плотный край.
100 добавляет все тонкие детали.
Промежуточные значения смешивают одно с другим.
Ползунок действует на весь слой сразу, а не на отдельные кадры.
Ничего не пересчитывается: картинка меняется мгновенно. Edge Fix и Export берут то значение, которое стоит на момент их запуска.
Ctrl+клик сбрасывает значение. Одно перетаскивание — один шаг отмены (Ctrl+Z).
Refine: правка края метками
Если край в каком-то месте неправильный, нарисуйте метки на стороне Input. Метка говорит расчёту края, что это за область:
Метка
Клавиша
Где рисовать
Background
1
фон, который пролез в маску
Unknown
2
край, который вышел слишком жёстким или неверным: его посчитают заново (пальцы, волосы, смаз)
Object
3
дырки в объекте, которые должны быть сплошными
Каждый мазок сразу пересчитывает текущий кадр в небольшой области вокруг меток. Это занимает секунду-две, так что результат виден сразу.
Размер кисти — число под инструментами рисования слева на вьюере. Чтобы его поменять, зажмите Shift и тяните по картинке.
Перед мазком выберите Single frame для правки одного кадра или All frames для переноса по диапазону. Разметьте несколько ключевых кадров и нажмите Track fixes: метки All frames переносятся с учётом движения, затем изменённые кадры пересчитываются.
Метки кадра удаляются через удаление ключей на таймлайне. Reset all удаляет все правки слоя. Если Soft устарела после изменения Hard, используйте Update.
Осторожно Метки и Fine detail mix работают только на слое, у которого уже есть Soft, поэтому сначала запустите Auto enhance.
Советы
Сначала короткий кусок. Поставьте IN/OUT на 10–20 трудных кадров, посчитайте, проверьте в Solo при увеличении 200–400% и только потом запускайте весь шот.
Проверяйте край в движении. Быстрые руки и повороты головы показывают то, что прячет стоп-кадр. Гоняйте диапазон по кругу (L, K).
Фон лезет в маску? Выберите All frames, нарисуйте метки Background на паре кадров и нажмите Track fixes.
Слишком резкий край на смазе? Закрасьте его меткой Unknown.
Мерцание через ровные промежутки — это стык кусков. Поднимите Overlap на один-два кадра.
Для сравнения Hard и Soft шторкой A/B (W) закройте Refine. Space разворачивает вьюер на весь экран.