The shortest path from a video file to a matte in Nuke. Six steps; the full manual covers each one in detail.
Import→Layer→Track→Auto enhance→Refine→Export
1. New project: import the clip
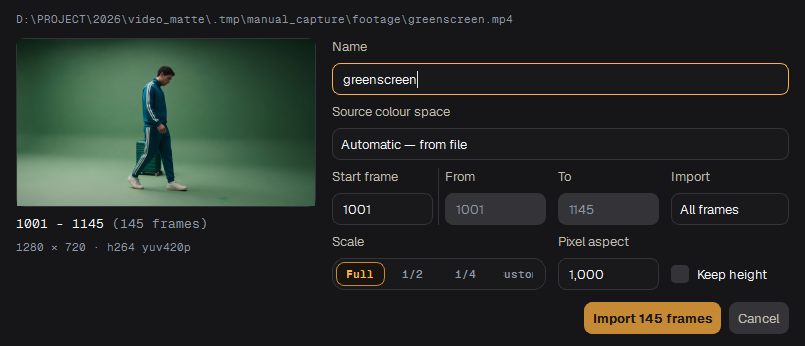
Drag a video or an image sequence onto the home screen (or press Browse files). Check the name and press Import; the project opens while the frames are extracted. More: Importing footage.
The import window
2. Create a layer
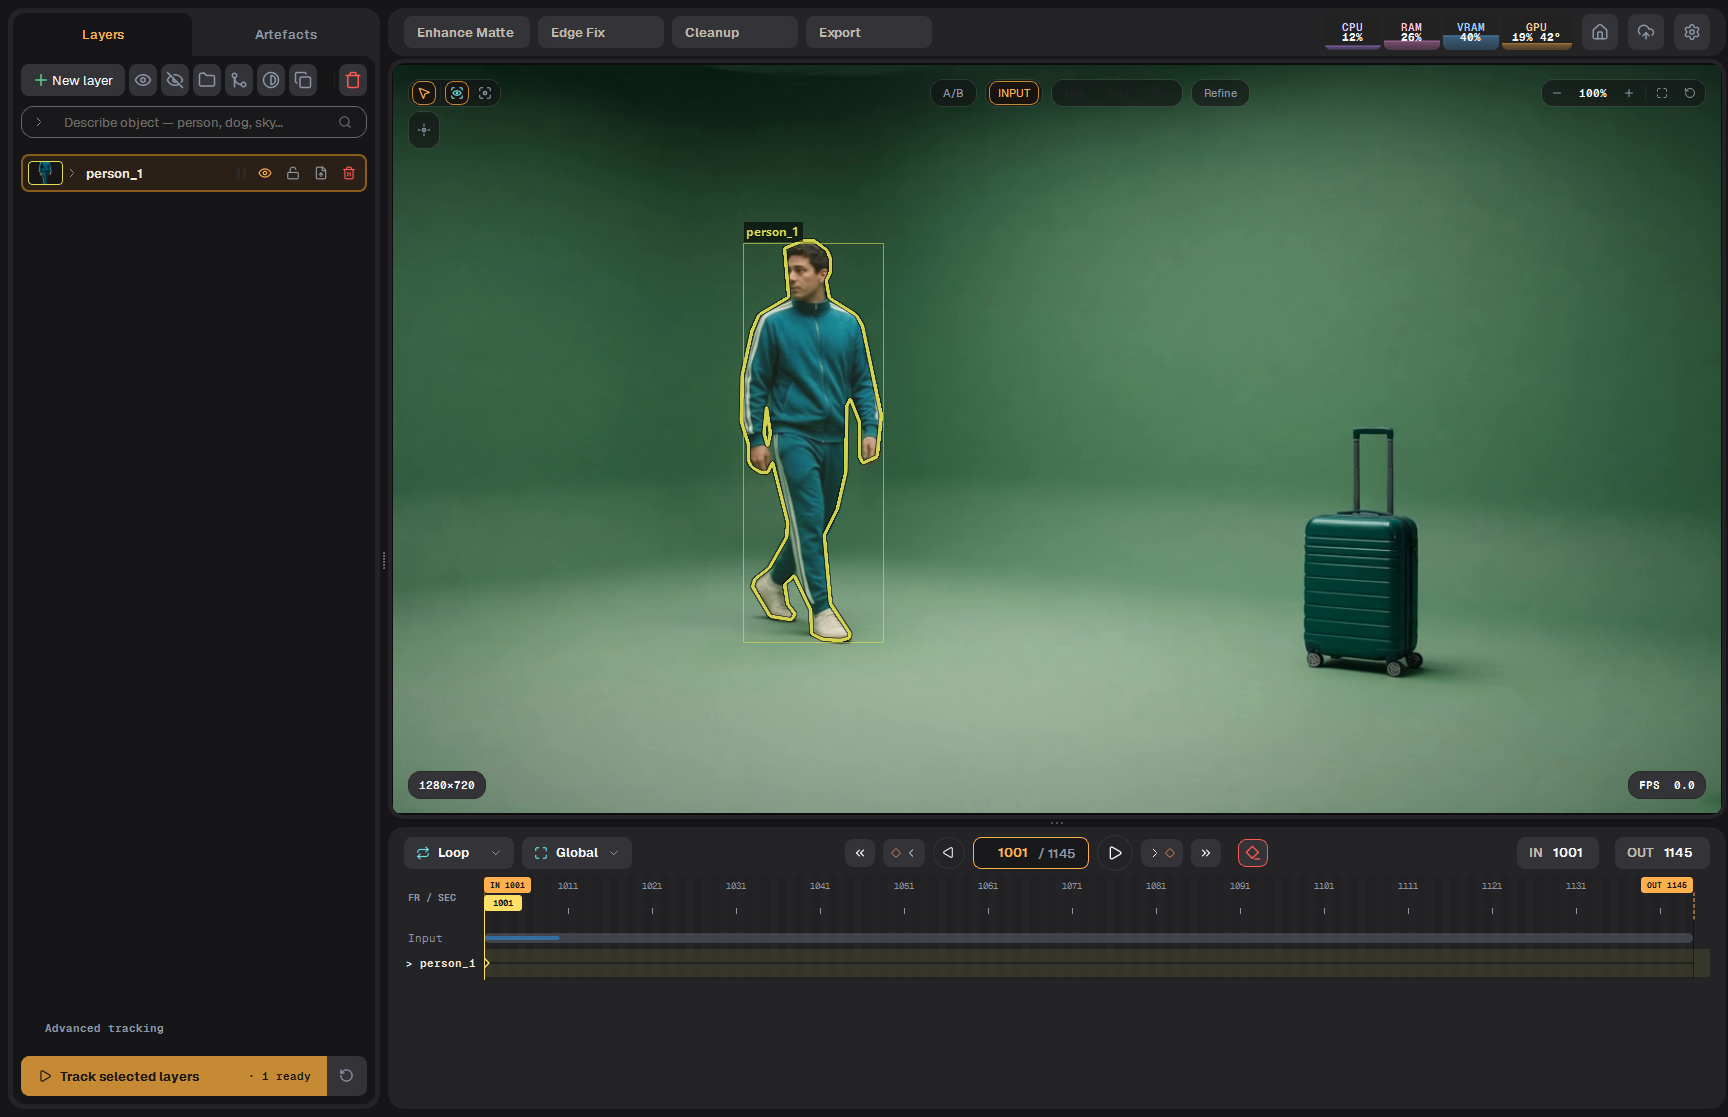
Type what you want to matte into Describe object — person, dog, sky… (for example "man") and press Enter. With nothing selected, every object the phrase finds becomes its own layer. With a layer selected, they all go into that layer. Or press New layer and click on the object. More: Layers.
Text search found the man and made a layer
3. Track the object
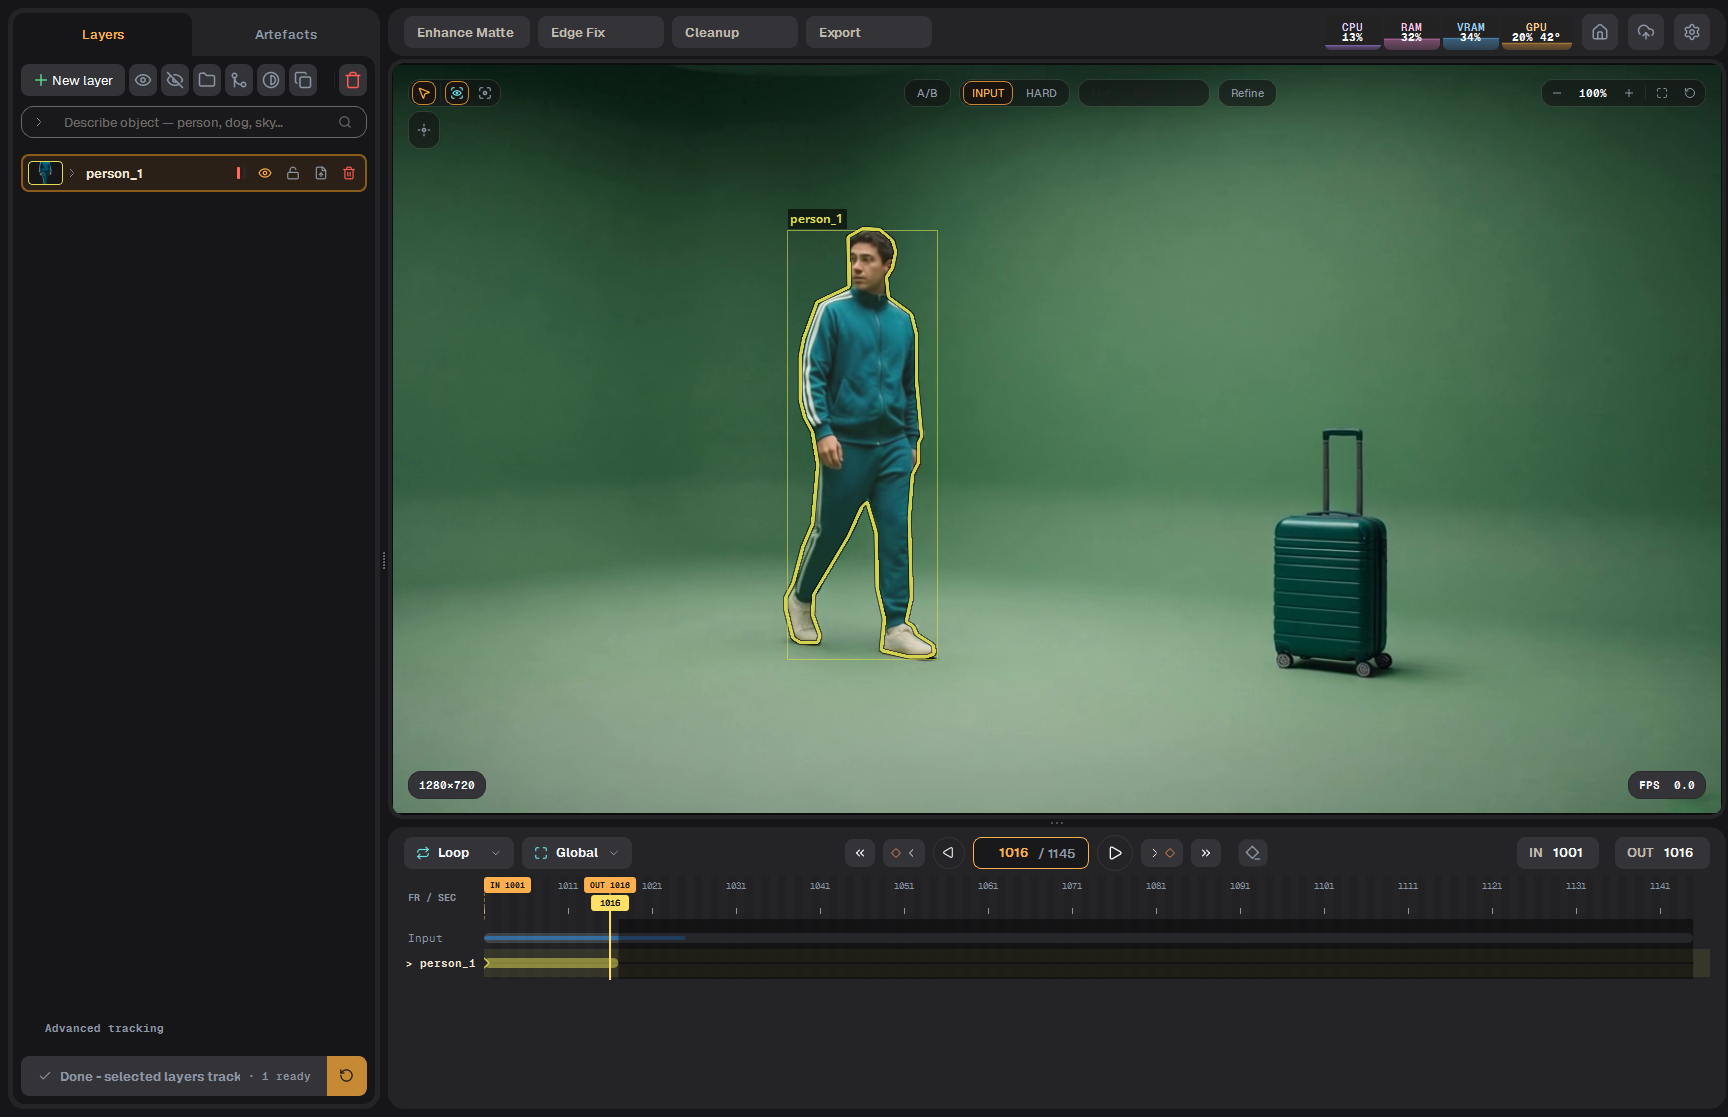
Set a short IN/OUT for a first try (SET IN / SET OUT), then press Track all layers at the bottom of the Objects panel. The mask follows the object; this is the Hard matte. More: Track, Timeline.
After tracking: the mask follows the man
4. Auto enhance
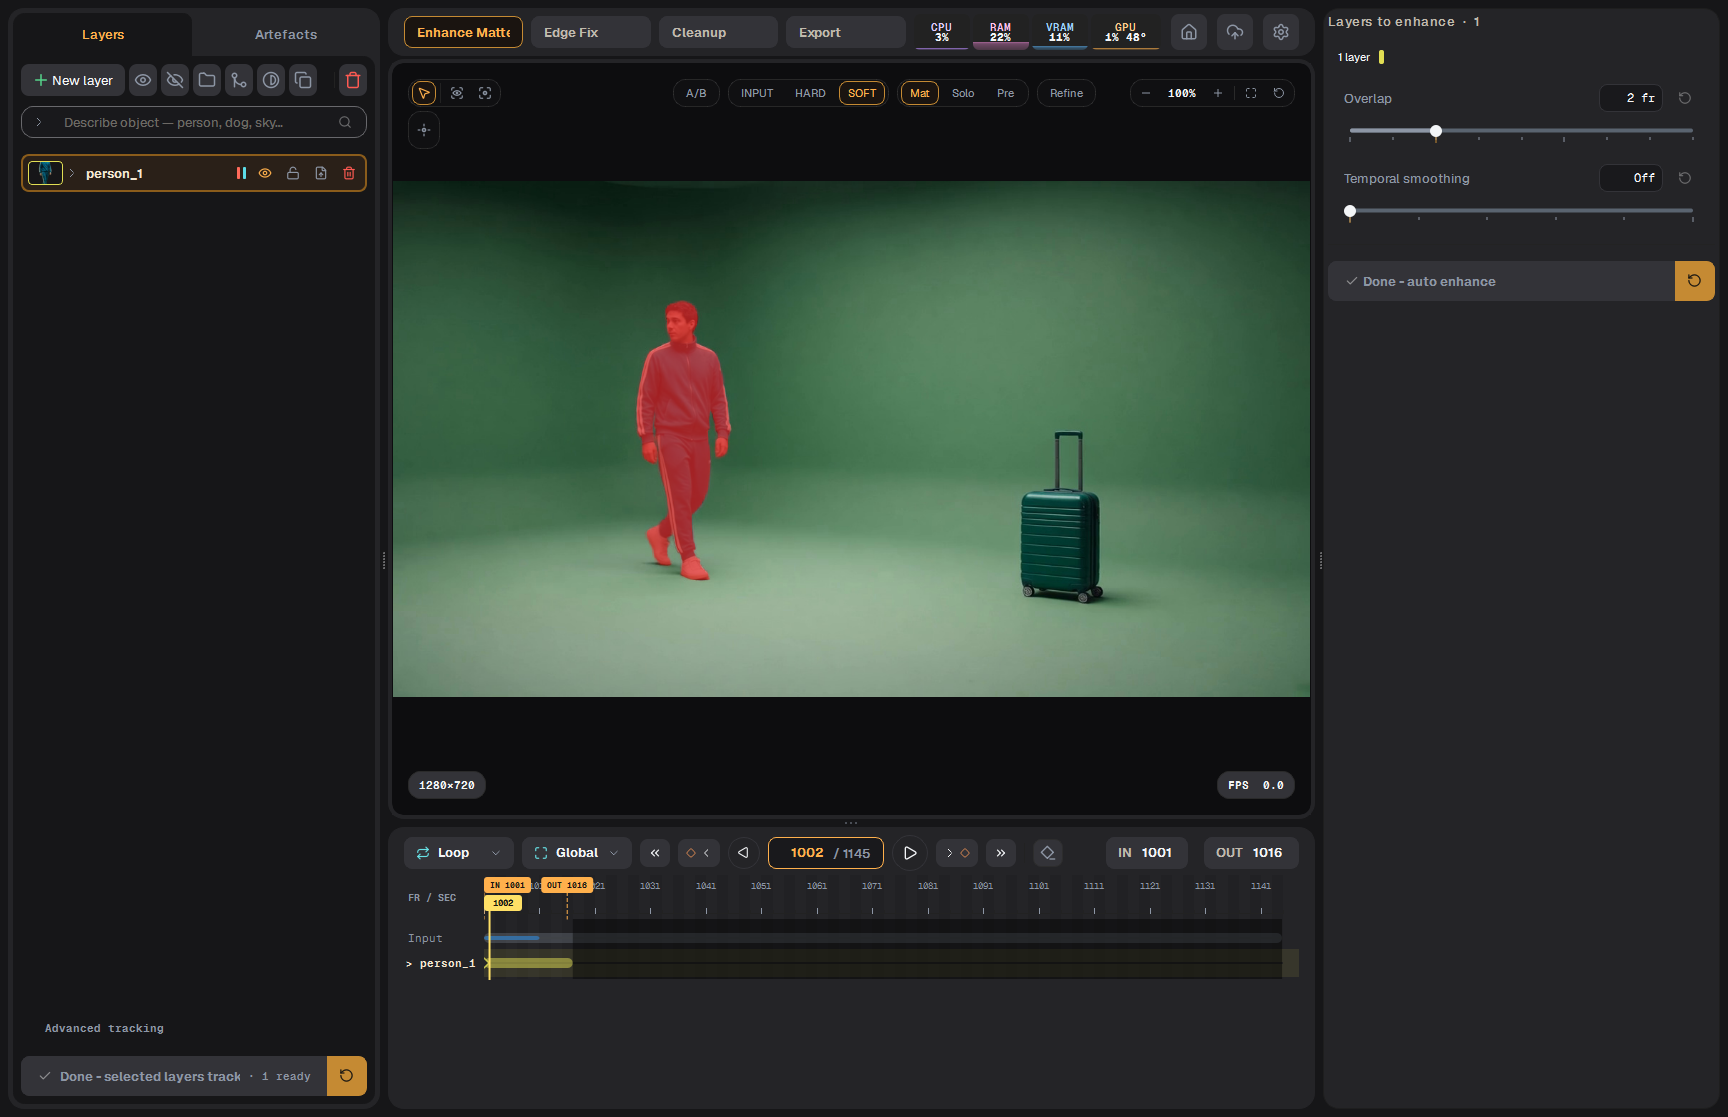
Open Enhance Matte on the stage bar and press Auto enhance. It turns the Hard into a Soft matte with a real edge on hair and motion blur. More: Enhance Matte.
Auto enhance done
5. Quick Refine
Press Refine and select the views to compare. Zoom into the edge and play the range. If hair looks too thin or too thick, move Fine detail mix. More: Refine.
6. Export to Nuke
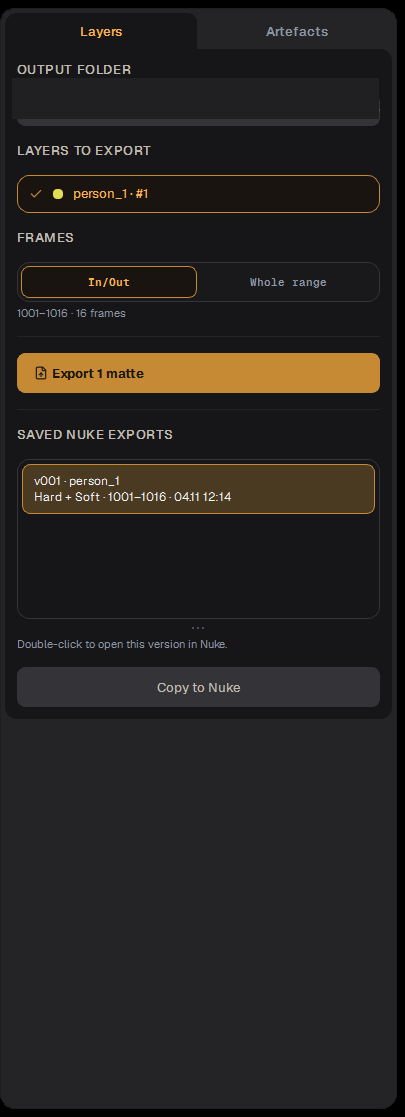
Open Export, tick the layer and press Export. Then select the saved export, press Copy to Nuke and paste with Ctrl+V in Nuke. More: Export.
The Export drawer
Tip Happy with the short range? Widen IN/OUT to the whole shot and run Track and Auto enhance again: the app processes the frames that need work.
Быстрый старт
Самый короткий путь от видеофайла до маски в Nuke. Шесть шагов; подробно каждый описан в полном руководстве.
Импорт→Слой→Трекинг→Auto enhance→Refine→Экспорт
1. Новый проект: импорт клипа
Перетащите видео или секвенцию на главный экран (или нажмите Browse files). Проверьте название и нажмите Import; проект откроется, пока кадры извлекаются. Подробнее: Импорт.
Окно импорта
2. Создайте слой
Напишите, что нужно вырезать, в поле Describe object — person, dog, sky… (например «man») и нажмите Enter. Если ничего не выделено, каждый найденный объект становится своим слоем. Если выделен слой, все найденные объекты попадают в него. Или нажмите New layer и щёлкните по объекту. Подробнее: Слои.
Поиск по тексту нашёл человека и создал слой
3. Затрекайте объект
Для первой пробы поставьте короткий IN/OUT (SET IN / SET OUT), затем нажмите Track all layers внизу панели Objects. Маска пойдёт за объектом — это Hard-маска. Подробнее: Трекинг, Таймлайн.
После трекинга маска следует за человеком
4. Auto enhance
Откройте Enhance Matte на панели этапов и нажмите Auto enhance. Hard превратится в Soft-маску с настоящим краем на волосах и моушн-блюре. Подробнее: Enhance Matte.
Auto enhance готов
5. Быстрая проверка в Refine
Нажмите Refine и выберите виды для сравнения. Приблизьте край и проиграйте диапазон. Если волосы слишком тонкие или толстые, подвиньте Fine detail mix. Подробнее: Refine.
6. Экспорт в Nuke
Откройте Export, отметьте слой и нажмите Export. Затем выберите сохранённый экспорт, нажмите Copy to Nuke и вставьте в Nuke через Ctrl+V. Подробнее: Экспорт.
Панель Export
Совет Короткий диапазон устраивает? Расширьте IN/OUT на весь шот и снова запустите Track и Auto enhance: приложение обработает необходимые кадры.